The Kenmore 12 Stitch Sewing Machine is a versatile and user-friendly appliance designed for both beginners and experienced sewers. It offers 12 built-in stitches, including straight, zigzag, and decorative options, making it suitable for a wide range of fabrics and projects. With features like adjustable stitch length and width, this machine ensures precision and customization. Its compact design and intuitive controls make it easy to operate, while the included accessories enhance its functionality. Perfect for crafting, repairing, or creating custom garments, the Kenmore 12 Stitch Sewing Machine is a reliable tool for any sewing task.
Overview of Features and Benefits
The Kenmore 12 Stitch Sewing Machine offers a range of features designed to enhance sewing efficiency and creativity. It includes 12 built-in stitches, such as straight, zigzag, and decorative options, catering to various fabrics and projects. The Ultra-Stitch feature ensures uniform stitching, while the Sew-by-Color capability simplifies pattern following. A free-arm design allows easy sewing of cuffs and sleeves, and adjustable stitch length and width provide customization. Suitable for delicate to heavy-duty fabrics, this machine comes with multiple presser feet and a comprehensive manual for optimal performance.
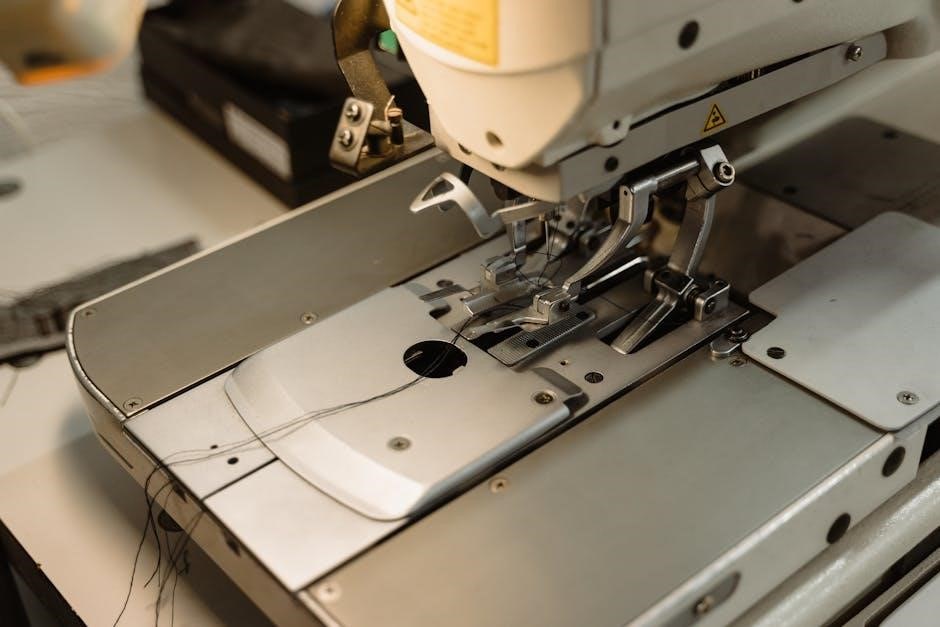
Understanding the Machine Components
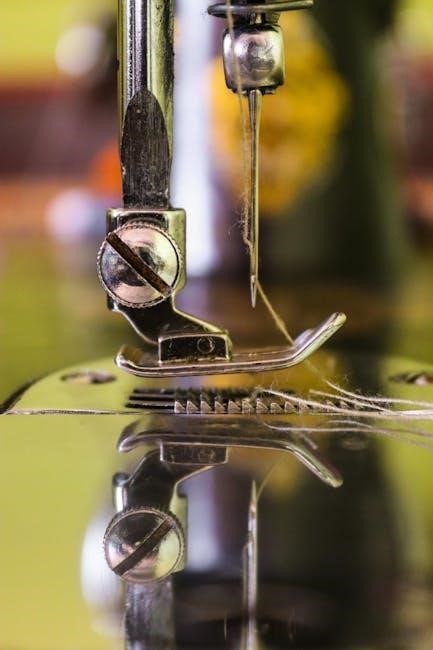
The Kenmore 12 Stitch Sewing Machine features a power switch, spool pins, tension dials, stitch selector, presser foot, and bobbin area. These components ensure smooth operation.
Identifying Key Parts and Their Functions
The Kenmore 12 Stitch Sewing Machine includes essential components like the power switch, spool pins, tension dials, and stitch selector. The presser foot handles fabric feeding, while the bobbin area manages thread delivery. The handwheel controls needle movement, and the reverse stitch lever ensures secure seams. Each part is designed for specific tasks, ensuring efficient and precise sewing operations. Understanding these elements is crucial for optimal machine performance and troubleshooting.
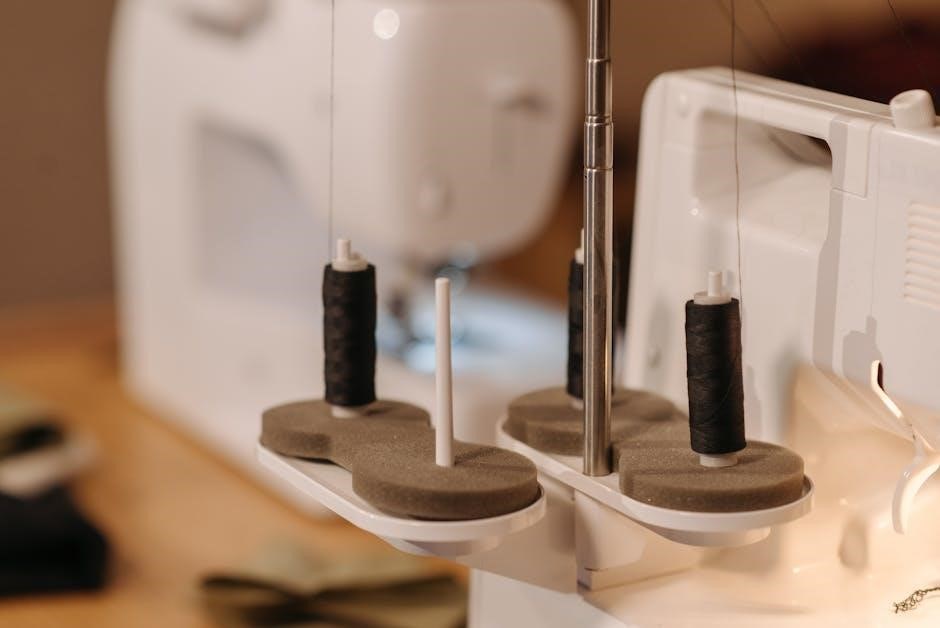
Threading and Bobbin Setup
Proper threading and bobbin setup ensure smooth operation. Thread the machine through the spool pin, tension discs, and take-up lever. Wind the bobbin evenly. Install the bobbin correctly.
Step-by-Step Guide to Proper Threading
- Turn on the machine and locate the spool pin and tension discs.
- Thread the machine by guiding the thread through the spool pin, tension discs, and take-up lever;
- Ensure the thread is seated properly in the tension discs for consistent stitch quality.
- Wind the bobbin evenly, avoiding overfilling, and insert it into the bobbin case.
- Pull the thread gently to seat the bobbin correctly and ensure smooth operation.
Bobbin Winding and Installation Techniques
Properly winding and installing the bobbin is essential for smooth stitching. Start by preparing the bobbin, ensuring it’s free from debris. Wind the thread evenly around the bobbin, avoiding overfilling. Once full, cut the thread and insert the bobbin into the machine’s bobbin case. Pull the thread gently to seat it correctly. Ensure the bobbin is aligned properly to prevent jams. Regularly clean the bobbin area for optimal performance.
Stitch Selection and Customization
The Kenmore 12 Stitch Sewing Machine offers versatile stitching options, including straight, zigzag, and decorative stitches. Adjust stitch length and width for precise control, ensuring perfect results for any fabric or project.
How to Choose the Right Stitch for Your Project
Selecting the right stitch for your project is essential for achieving professional results. Use straight stitches for lightweight fabrics and straight seams, while zigzag stitches are ideal for stretchy materials. Decorative stitches add style to crafts and garments. Always consider fabric type, thickness, and project requirements when choosing a stitch. Adjust stitch length and width as needed for customization. Consult the manual for specific stitch recommendations to ensure optimal performance and durability.
Adjusting Stitch Length and Width
Adjusting stitch length and width on the Kenmore 12 Stitch Sewing Machine allows for precise control over your sewing projects. Use the stitch length dial to set the distance between stitches, ideal for heavy fabrics or delicate materials. The width adjustment ensures even stitching, preventing fabric bunching or stretching. Follow the manual’s guidance to customize settings for optimal results, ensuring smooth operation and professional finishes for any fabric type or project requirement.
Maintenance and Care
Regular cleaning and lubricating are essential to ensure the Kenmore 12 Stitch Sewing Machine runs smoothly. Dust and lint can accumulate, so use a soft brush to clean internal parts. Oil the machine periodically to prevent friction and wear. Refer to the manual for specific maintenance schedules and guidelines to extend the machine’s lifespan and performance.
Cleaning and Lubricating the Machine
Regular maintenance is crucial for optimal performance. Use a soft brush to remove lint and debris from the machine’s interior, paying attention to the bobbin area. Periodically apply sewing machine oil to moving parts to reduce friction and prevent wear. Refer to the manual for specific lubrication points and cleaning techniques. Proper care ensures smooth operation, prevents damage, and extends the machine’s lifespan.
Regular Maintenance Schedule
To ensure optimal performance, maintain your Kenmore 12 Stitch Sewing Machine with a regular schedule. Clean the bobbin area and remove lint daily after use. Lubricate moving parts every 50 hours of operation or as needed; Check and replace the needle frequently to prevent damage. Inspect tension discs and presser feet for wear. Refer to the manual for detailed instructions and recommended maintenance intervals to keep your machine running smoothly and efficiently.
Troubleshooting Common Issues
Identify and resolve issues like thread tension problems or jammed stitches by checking the manual. Clean the machine regularly, ensure proper bobbin alignment, and use the correct needle size to prevent errors.
Solving Thread Tension Problems
Thread tension issues are common but easily resolved. Check if the thread is properly threaded through the machine, ensuring it passes through all guides. Adjust the tension dials on the machine to balance the stitch. If the bobbin thread is loose, tighten the bobbin case screw. Use the correct needle size and thread type for your fabric. Regularly clean lint from the tension discs and bobbin area to maintain even stitching. Refer to the manual for specific adjustments.
Fixing Jammed Stitches and Other Errors
If your Kenmore 12 Stitch Sewing Machine jams, turn it off and unplug it. Gently remove the needle and any tangled thread. Check the bobbin area for lint or debris and clean it thoroughly. Ensure the fabric is moving smoothly without pulling. If the machine persistently jams, consult the manual for specific troubleshooting steps or consider professional servicing to avoid further damage. Regular maintenance can prevent such issues;
Exploring the 12 Built-In Stitches
The Kenmore 12 Stitch Sewing Machine features 12 versatile stitches, including straight, zigzag, and decorative options. Perfect for various fabrics and projects, it offers ease and precision.
Description of Each Stitch Type
The Kenmore 12 Stitch Sewing Machine offers a variety of stitches to suit different sewing needs. These include the straight stitch for basic sewing, zigzag stitch for stretchy fabrics, and decorative stitches like the satin stitch and stretch stitch. Additionally, it features utility stitches such as the backstitch and blind hem stitch. Each stitch type is designed to handle specific fabrics and projects, ensuring versatility and precision for both casual and advanced sewing tasks.
Recommended Fabrics for Each Stitch
The Kenmore 12 Stitch Sewing Machine is compatible with a variety of fabrics. Straight stitches work best on lightweight cotton, linen, and polyester blends. Zigzag stitches are ideal for stretchy fabrics like knits and elastane blends. Decorative stitches, such as the satin stitch, are perfect for delicate fabrics like silk and chiffon. Utility stitches, including the backstitch, are suitable for heavier materials like denim and canvas, ensuring durability and precision for every project.
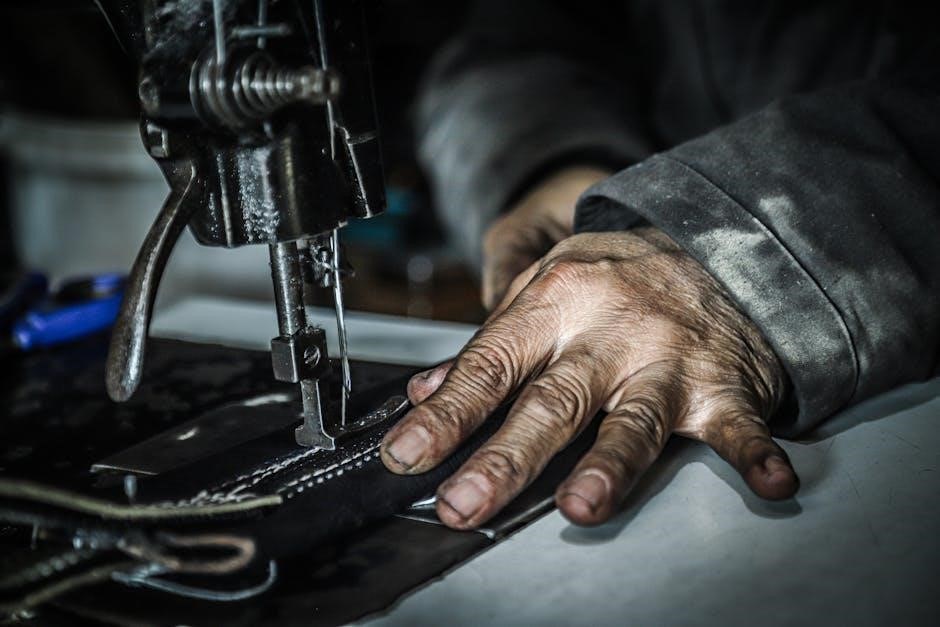
Basic Sewing Techniques
Mastering basic techniques is essential for seamless sewing. Start with sewing straight lines, gradually progressing to curves. Backstitch at the beginning and end of seams for durability. Guide fabric smoothly and use the appropriate presser foot for optimal results.
Sewing Straight Lines and Curves
Start by sewing straight lines, aligning fabric edges with the machine’s edge guide. For curves, gently guide fabric, maintaining steady movement. Backstitch at the beginning and end for secure seams. Use the appropriate presser foot to ensure even feeding. Keep fabric taut but not stretched. Practice adjusting speed for smoother transitions between straight lines and curves. This technique ensures professional-looking results for various projects, from garments to home decor.
Backstitching and Securing Seams
Backstitching strengthens seams by sewing a few reverse stitches at the start and end of your project. Engage the reverse stitch option on the Kenmore 12 Stitch Sewing Machine to create secure backstitches. This ensures seams won’t unravel, especially on heavy-use areas like stress points. For added durability, tie thread ends by hand or use a zigzag stitch over seam allowances. Proper backstitching and securing are essential for long-lasting, professional-quality results.

Advanced Features and Capabilities
The Kenmore 12 Stitch Sewing Machine features advanced options like the Ultra-Stitch function for consistent stitching and Sew-by-Color for intuitive thread matching, enhancing creativity and precision.
Using the Ultra-Stitch Feature
The Ultra-Stitch feature on the Kenmore 12 Stitch Sewing Machine ensures uniform stitch formation, ideal for delicate fabrics and heavy-duty materials. To activate, press the Ultra-Stitch button, and the machine will adjust tension and stitch length automatically for consistent results. This feature is particularly useful for achieving professional-looking seams on various fabrics, making it a versatile tool for both everyday and complex sewing projects.
Sew-by-Color Feature Explanation
The Sew-by-Color feature on the Kenmore 12 Stitch Sewing Machine simplifies stitch selection by associating colors with specific stitch types. Each stitch is represented by a unique color code, making it easy to identify and choose the right stitch for your fabric. This intuitive system saves time and ensures optimal stitching results, allowing you to focus on creating professional-quality projects with ease.
Safety Precautions and Best Practices
Ensure safe operation by keeping loose clothing tied back, avoiding distractions while sewing, using the correct presser foot for each fabric, and never touching hot machine parts.
Proper Handling and Storage
Always handle the Kenmore 12 Stitch Sewing Machine with care to ensure longevity. Clean the machine regularly using a soft cloth to remove dust and debris. Store it in a dry, cool place, away from direct sunlight and moisture. Use the original packaging or a sturdy cover to protect it from dust when not in use. Avoid placing heavy objects on the machine, as this could cause damage. For optimal preservation, refer to the manual for specific storage recommendations.
Avoiding Common Mistakes
Common mistakes with the Kenmore 12 Stitch Sewing Machine include improper thread tension, incorrect needle size, and neglecting to clean the machine. Always ensure the needle is inserted correctly and the bobbin is wound evenly. Avoid using the wrong presser foot for the fabric type, as this can cause uneven stitching. Regularly clean dust and lint from the machine to prevent jams. Refer to the manual for specific troubleshooting tips to maintain optimal performance and avoid costly repairs.
Resources for Further Learning
The Kenmore 12 Stitch Sewing Machine manual is available online as a PDF, along with tutorials and community forums offering tips, guides, and troubleshooting assistance.
Accessing the Official Manual PDF
The official Kenmore 12 Stitch Sewing Machine manual can be easily downloaded as a PDF from Sears Parts Direct or other trusted websites. Simply visit the official Sears Parts Direct website, enter your machine’s model number, and download the manual for free. This comprehensive guide covers threading, tension adjustment, stitch selection, and maintenance tips, ensuring you get the most out of your sewing machine. Save or print it for convenient reference.
Online Tutorials and Community Support
Enhance your sewing skills with online tutorials and community support available for the Kenmore 12 Stitch Sewing Machine. Video tutorials on platforms like YouTube guide you through setup, stitching, and troubleshooting. Official Sears Parts Direct offers detailed guides and manuals, while sewing forums and groups share tips and solutions from experienced users. Engage with the sewing community to resolve common issues and explore creative projects tailored to your machine’s capabilities.
The Kenmore 12 Stitch Sewing Machine is a versatile tool for crafting and repairs, offering 12 stitches for various fabrics. With proper care and use, it ensures creative sewing experiences and durable results, making it a valuable addition to any sewing workspace.
The Kenmore 12 Stitch Sewing Machine is a versatile tool offering 12 built-in stitches for various projects. It is user-friendly, suitable for both beginners and experienced sewers. Proper threading, bobbin setup, and stitch selection are essential for optimal performance. Regular maintenance, including cleaning and lubricating, ensures longevity. Troubleshooting common issues like thread tension and jams can be addressed with guidance from the manual. By following these tips, users can maximize their sewing experience and create high-quality projects efficiently.
Encouragement for Creative Sewing
Unleash your creativity with the Kenmore 12 Stitch Sewing Machine! Its versatility and ease of use make it perfect for exploring various sewing projects. From repairing clothes to crafting unique garments, this machine empowers you to bring your ideas to life. Experiment with different stitches and fabrics to discover new possibilities. Start small, learn as you go, and enjoy the satisfaction of creating something truly personalized. Sewing is not just a skill—it’s a creative journey!